By using our website, you agree to the use of cookies as described in our Cookie Policy
a
Rss Feed
How to Prep Your Nursery Walls for Peel-and-Stick or Prepasted Wallpaper
 Image Credit: Pexels
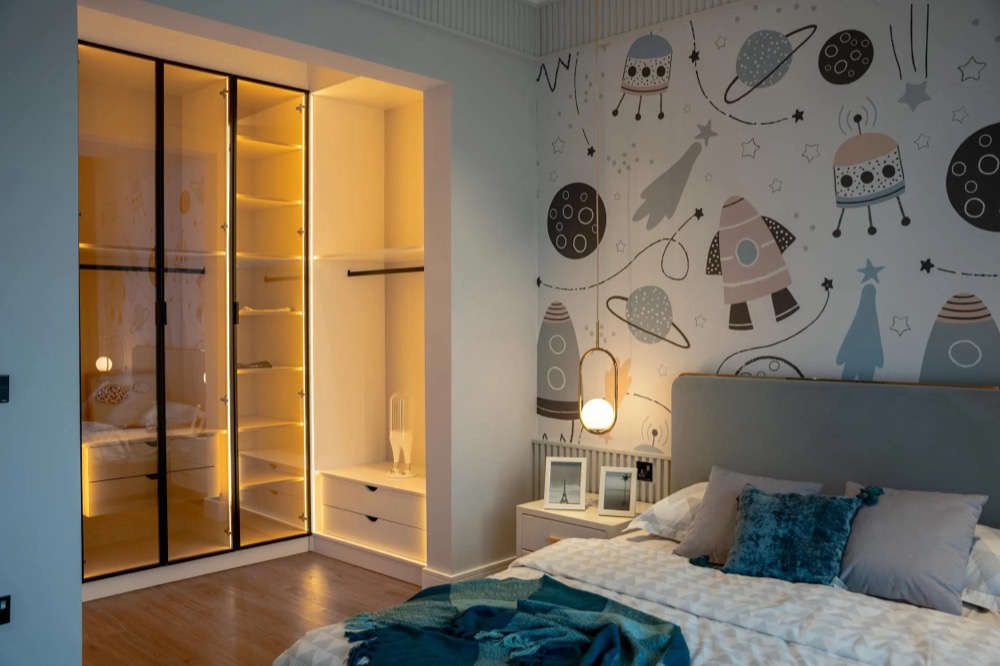
Creating a cozy and stylish nursery for your little one is an exciting project. One of the best ways to add personality to the room is by applying baby room wallpaper. However, ensuring that your walls are prepped correctly is key to achieving a flawless finish that lasts. Whether you’re working with peel-and-stick or prepasted wallpaper, this guide will walk you through the steps to prepare your nursery walls like a pro.
Why Wall Prep is Essential for Wallpaper Installation
Before diving into the wallpaper application process, it's important to understand why wall preparation matters. Poorly prepped walls can lead to peeling, bubbling, or uneven application, ruining the overall look of your design. Preparing your walls ensures that your wallpaper adheres properly and creates a smooth, professional finish, especially in a space as important as your nursery.
Step 1: Choose the Right Wallpaper
When it comes to nursery designs, opt for high-quality wallpaper for a bedroom or a baby’s room to match the overall aesthetic. Peel-and-stick options are great for renters or those who want an easy-to-remove solution, while prepasted wallpaper offers a more traditional and durable choice.
Step 2: Gather Your Tools
Having the right tools at hand will make the wall prep process much smoother. You’ll need:
- Mild Detergent or Sugar Soap
- Sponge or Cloth
- Sandpaper (Medium-grit)
- Filler or Spackling Paste
- Putty Knife
- Level
- Painter’s Tape
- Primer (Optional but Recommended)
Step 3: Clear and Clean the Walls
Clear the Space
Remove furniture, wall decor, outlet covers, and switch plates from the walls. This will give you a clean and open area to work on without obstructions.
Clean the Walls Thoroughly
Use a mild detergent or sugar soap mixed with warm water to clean the walls. Dirt, grease, or dust can prevent wallpaper from adhering properly. Gently scrub the surface with a sponge, rinse with clean water, and let the walls dry completely.
Step 4: Smooth the Surface
Fill in Imperfections
Inspect the walls for cracks, holes, or uneven textures. Use a filler or spackling paste to fix these areas. Smooth out the filler with a putty knife and allow it to dry.
Sand the Walls
Once the filler is dry, sand the walls with medium-grit sandpaper. This will ensure a smooth surface for the wallpaper to stick to. Dust off any debris with a dry cloth or vacuum.
Step 5: Prime the Walls (Optional but Recommended)
Applying a primer creates a barrier that prevents the adhesive from damaging your wall’s paint. This step is especially important for prepasted wallpaper, as it enhances adhesion and makes removal easier in the future. Choose a primer specifically designed for wallpaper for the best results.
Step 6: Mark Your Starting Point
Using a level, draw a vertical guideline on the wall where you’ll start applying the wallpaper. This ensures your wallpaper is straight from the very first strip, preventing crooked lines as you go.
Step 7: Protect Edges and Outlets
Apply painter’s tape around trims, windows, and outlets to avoid getting adhesive or wallpaper paste in unwanted areas. This will help keep the job tidy and professional-looking.
Step 8: Prepare the Wallpaper
Peel-and-Stick Wallpaper
Peel a small portion of the backing to start and work gradually to prevent creases or air bubbles.
Prepasted Wallpaper
Soak the strips in water according to the manufacturer’s instructions. Let the adhesive activate for the recommended time.
Step 9: Start Applying the Wallpaper
Align the First Strip
Position the wallpaper at the top of the wall, aligning it with your guideline. Allow a small overlap at the ceiling and baseboard for trimming later. Smooth the wallpaper down with your hands or a smoothing tool, working from the center outward to eliminate air bubbles.
Continue with Subsequent Strips
Match the pattern carefully and ensure there’s no gap between strips. For peel-and-stick options, peel the backing as you go. For prepasted wallpaper, use a sponge to press it into place and remove excess moisture.
Step 10: Trim Excess Wallpaper
Once all the strips are in place, use a sharp utility knife to trim excess wallpaper along the edges. Be careful to cut clean lines for a polished finish.
Step 11: Let the Wallpaper Set
Allow the wallpaper to set for at least 24 hours before moving furniture or decorations back into the room. This ensures the adhesive fully cures and the wallpaper stays securely in place.
Final Thoughts
Prepping your walls is an essential step in achieving a seamless and long-lasting wallpaper application. Whether you’re using baby room wallpaper or a stylish wallpaper for a bedroom, following these steps will ensure that your nursery walls look picture-perfect. With a little effort and attention to detail, you’ll create a warm and welcoming space your baby will love.
‹ Back


.png)
